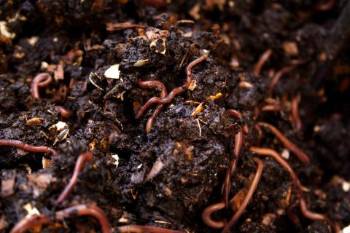
Vermicomposting

Vermiculture (raising worms) and vermicomposting (composting with worms) are growing in popularity because they are a great way to compost kitchen food scraps. Vermicomposting is different from traditional composting that relies on microbes and fungi to break down the food versus vermicompost where the worms do most of the work. One benefit of vermicomposting is that you don’t have to aerate or turn the compost pile, the worms will manage that for you and the compost bin won’t give off heat (in fact heat is a bad thing in a worm bin).
Worms can eat a variety of foods including fruit and vegetable scraps (avoid feeding large quantity of broccoli, cabbage, etc due to smell), tea bags, coffee grounds, pasta, cereal and bread. Food should be in smaller pieces (1/2”-1” to increase the rate of break down. I also recommend avoiding citrus, garlic, onions, dairy or meat products and highly acidic or spicy foods. Worms break down the food and turn it into rich worm castings that can be used as fertilizer in the garden or with your houseplants. A worm bin will also provide “compost tea” which is the excess liquid that needs to be drained from the bin and also works as a fertilizer for plants.
Worms in nature tend to live in dark, damp locations and we need to mimic these conditions in our worm bins. There are several commercially made bins that are available for purchase however you can also easily make one at home using plastic totes or a wooden box. One of the easiest ways to make a bin is using two 10 gallon plastic totes, they must be opaque (no clear totes, remember worms like dark). One of your totes will serve as the bottom and collect the “compost tea” so the worm bedding won’t get too wet (worm’s like damp but they will escape your bin if the bedding is too wet) and the other will serve as the composting bin. In the bottom of your composting bin drill approximately 20 ¼” holes (larger depending on the worm you choose, more on that later) to allow excess moisture to drain out. You will also drill a row of holes approximately 2” apart on the side of the bin near the top to allow air flow in the bin. The bin pictured on the right uses larger holes with vents instead of the smaller holes around the whole bin. The bottom bin needs no modification, simply place blocks or 4” pots in the bottom to hold the upper bin up to give the compost tea more room to collect. Once the bin is made, the worms need some bedding to live in. Some options for bedding include shredded paper, shredded cardboard, commercially made worm bedding, coco coir and a mix of the above with decaying leaves. It’s best to have a layer of bedding approximately 8” deep, the worms are surface feeders so deeper bedding doesn’t make sense for them. Make sure the bedding stays damp (like a wrung-out sponge) so misting may be necessary once a week or so. If you want to watch a video on making a Worm Bin check out this link: https://www.youtube.com/watch?v=sl1M6NOOzIA&t=6s
The final step is the worms. Unfortunately, earthworms from the backyard are not good composting worms. They tend to be solitary, feed deeper underground and don’t eat enough to be effective composters. The most commonly used worm and probably the best are Red Wigglers which go by the scientific name Eisenia fetida. They are easy to find either online or you might be able to find people locally that have some for sale as well. I choose to use European nightcrawlers or European “Super worms” in my bin. They are supposed to be almost as good composters as the Red Wiggler but they are similar in size to an earthworm I would find outside. Worms do need to stay between 55-80 degrees F so keep them inside in the winter and out of direct sun in the summer.
Worm composting is a great alternative to composting outdoors, especially in the winter time. A pound of Red wigglers can consume a pound of produce a week on average. I can’t wait to see how my worm composter works, especially now that they are back in their bin (my bedding was too damp to begin with, oops). For a more informative video check out Scott Eckert’s video on Vermicomposting from the K-STATE Garden Hour: https://www.youtube.com/watch?v=T8CCg7bb66U

Have questions? Contact our office where our Horticulture Extension Agent will assist you with questions.
Phone: (316) 321-9660
Email: callae@ksu.edu