Collards
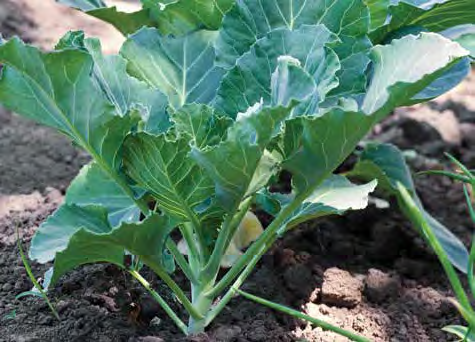 Collards are a cool season vegetable that tolerates both heat and cold, and hence can be grown most of the year in Kansas. However, flavor and quality will be better in the spring and fall than during the heat of summer. Collards are members of the cabbage family, but do not form heads and are grown for their leaves. Packed with vitamins and minerals, they are one of the most popular garden vegetables in the South and are rapidly becoming a delicacy in northern states as well. Para información en español, visite este sitio web.
For spring planting, look for bolt resistant cultivars. Most cultivars are acceptable for planting in the fall. Seeds should be started approximately 8 weeks prior to planting the transplants outdoors. Set transplants in late March to mid-April for a spring crop or in early August for a fall crop. Collards can also be direct-seeded into the garden if desired. Space plants 1½ to 2 feet apart if growing for full sized plants. Collards can become quite large if grown through the summer. If direct seeding, thin the plants as they grow until the desired spacing is achieved.
- Sunlight: Collards prefer full sun with some afternoon shade.
- Temperature: Collards are a cool season crop despite their reputation for being from the south. Mature plants will tolerate frosts and even mild freezes.
- Watering: Like other cole crops, collards have shallow root systems and benefit from consistent moisture throughout the growing season. Provide one to two inches of moisture through watering if not provided by rainfall. A lack of moisture can cause a bitter flavor in the greens.
- Soil and Fertilization: Collards may be grown in a variety of soils. Heavier loamy soils will produce the greatest yields. Lighter, well-drained, sandy soils are best for early spring crops. Soils should be well drained, rich in organic matter, and have a pH of 6.0 to 6.5. Leafy vegetables require quick, continuous growth for best quality. Use starter fertilizer when setting plants and provide additional fertilizer in 4 to 6 weeks if the foliage appears to be pale or growth is poor.
- Pests and Diseases: Cabbage worms and other insects are some of the biggest pests of collards. The easiest way to prevent these insect issues is to use floating row covers over the top of the plants to exclude the pests. Over-fertilization of collard plants can increase the severity of aphid infestations. Flea beetles eat small, round holes in the foliage, resulting in “shothole” damage. Adults are tiny, shiny, black beetles. They possess large hind legs that enable them to jump.
- Succession Planting: Plant collard transplants every two weeks to extend the harvest season if you plan to harvest entire plants. If you are only harvesting the young leaves succession planting is not necessary.
 Collards can be harvested a couple of different ways. The first option is to cut lower leaves close to the stalk, starting with the oldest leaves. Harvest only a few leaves from each plant at a time. This allows the plant to continue producing more leaves as it grows. The entire plant can also be cut at the soil level and the leaves stripped off for use. For the spring crop, flavor is best if you harvest the plants before the weather becomes hot and dry. For the fall crop, the cooler the weather, the better the flavor, until freezing temperatures stop growth. Collards can be frozen but the leaves are only suitable for eating cooked afterward. For information on freezing check out this University of Georgia website.
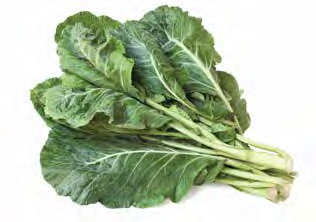
Collard greens grow as a loose bouquet rather than a tight “head” like other cabbages. Packed with vitamins and minerals, they are one of the most popular garden vegetables in the South and are rapidly becoming a delicacy in northern states as well.
Collard Potato Salad with Mustard Dressing
| Ingredients | Directions |
|
|
Recipe source: University of Missouri Extension
Shrimp and Collards Stir Fry
| Ingredients | Directions |
|
|
Recipe source: North Carolina State University Extension
Brazilian Style Collards
| Ingredients | Directions |
|
|
Recipe source: University of Missouri Extension